Configure a single sign-on (SSO) app in Entra ID
This topic discusses how to create an app in Microsoft Entra ID to handle single sign-on (SSO) from Entra ID when a network user attempts to access a protected network.
Create the app
In the Microsoft Entra ID portal, click Enterprise Applications on the home page and follow the instructions in Configure Microsoft Entra SSO on learn.microsoft.com.
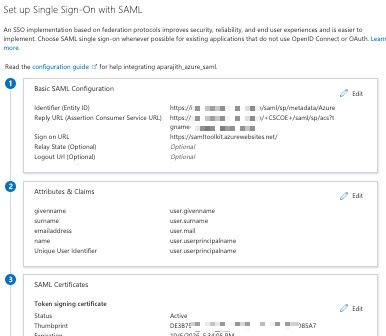
The following figure shows part of the SSO app configuration. You must provide some of the information on this page when you configure the Microsoft Azure AD (SAML) realm. For more information, see Get required information for your Microsoft Azure AD realm (active authentication only).

(Optional.) Upload the service provider metadata
If you already configured the Microsoft Azure AD (SAML) realm, click Upload metadata file at the top of the page to quickly provide configuration values for the SSO app.
The following figure shows an example.

Add users and groups to the SSO app
Add users and groups to your app as discussed in Add a user account to an enterprise application on learn.microsoft.com
What to do next
See Get required information for your Microsoft Azure AD realm (active authentication only).