This task explains how to get the information required to set up a Microsoft Azure AD realm (now called Entra ID) in the Cloud-Delivered
Firewall Management Center.
Follow these steps to get required information for your Microsoft Azure AD realm:
Procedure
Step 1 | Log in to https://portal.azure.com/ as a user with at least the Product Designer role.
-
At the top of the page, click Microsoft Entra ID.
-
In the left column, click App Registrations.
-
If necessary, filter the list of displayed apps to show the one you want to use.
-
Click the name of your app.
-
Click Copy ( ) next to the following values on this page and paste those values to a text file. ) next to the following values on this page and paste those values to a text file.
-
Application (Client) ID
-
Directory (tenant) ID
-
Click Client Credentials.
|
Step 2 | Unless you already know the client secret value (as opposed to the client secret ID), you must create a new client secret as follows:
-
Click New Client Secret.
-
Enter the required information in the provided fields.
-
Click Add.
-
Click Copy () next to Value as the following figure shows.
|
Step 3 | From https://portal.azure.com/, click .
-
In the right pane, click Copy () next to the value of Host name and paste the value to the clipboard. This is your event hub host name.
-
Write down or copy to a text file the name of the event hub (same as the Event Hubs Namespace at the top of the page).
-
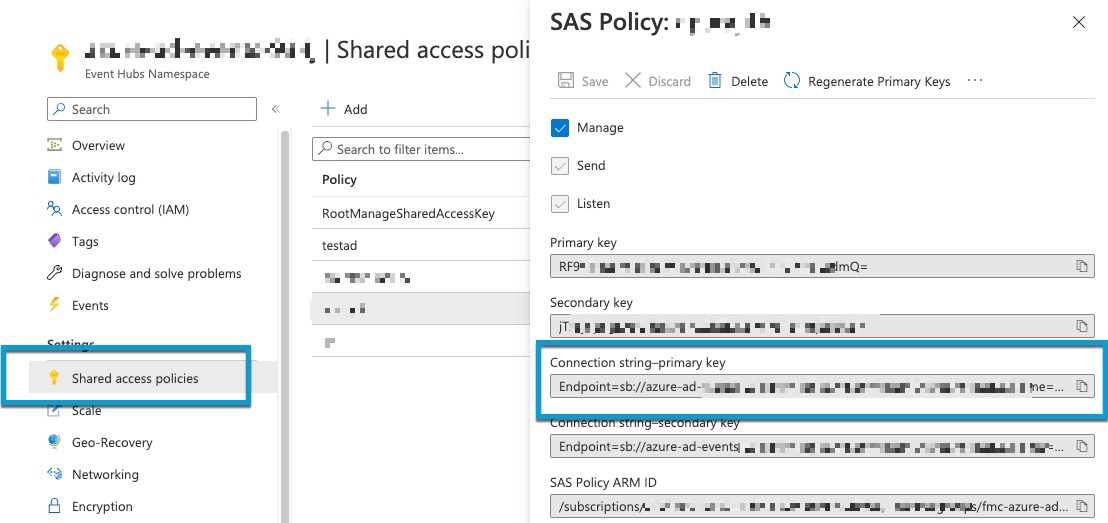
In the left pane, under Settings, click Shared access policies.
-
Click the name of a policy.
-
Click Copy () next to Connection string-primary key.
|
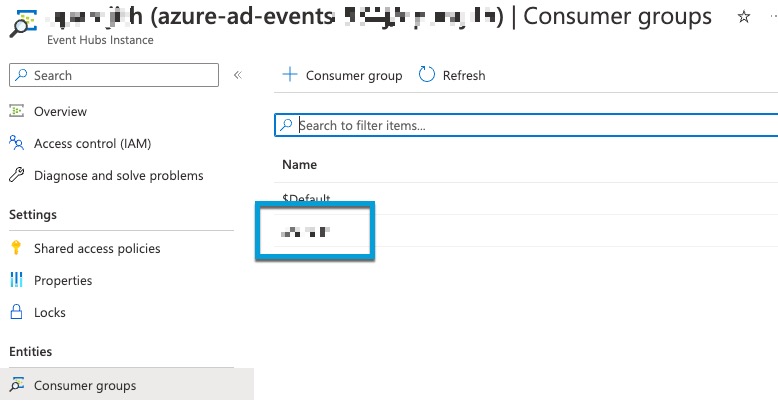
Step 4 | Click .
Write down the following value or copy it to the clipboard. This is your consumer group name.
|
Step 5 | In the left pane, click Overview. |
Step 6 | Click Copy () next to Namespace.  This is your event hubs topic name. |
Step 7 | Return to the home page and log in if necessary: https://portal.azure.com/#home.
-
Click Microsoft Entra ID.
-
In the left pane, click Enterprise Applications.
-
If necessary, filter the list of applications to locate yours.
-
Click the name of your enterprise application.
-
Click Get Started under Set up single sign on.
-
On your SSO app page, copy the value of Identifier (Entity ID) to the clipboard.
The following figure shows an example. 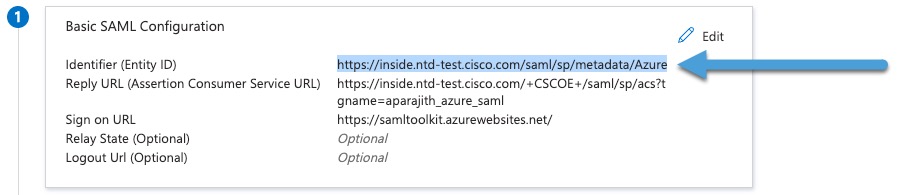
-
On your SSO app page, click the Download link next to Federation Metadata XML, as this figure shows.
The following figure shows an example. 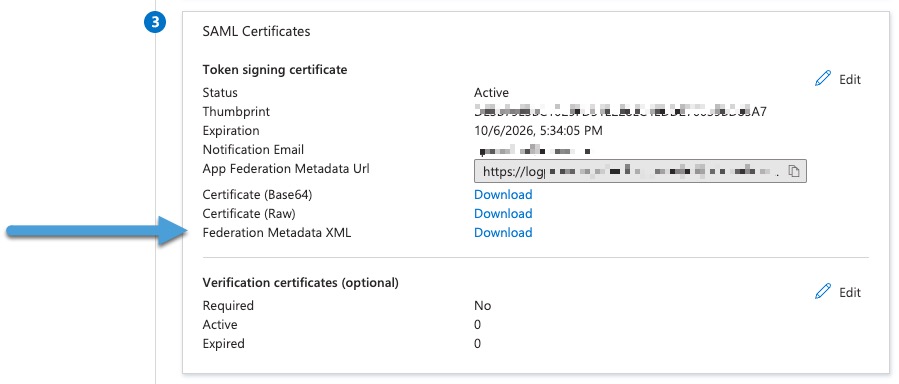
-
If you've already set up your SSO app, you can stop here. The Federation Metadata XML contains all the information required to configure the identity provider in the Cloud-Delivered Firewall Management Center.
-
(Optional if you already downloaded the federation XML.) Click Copy () next to both of these values and save them to a text file.
This figure shows an example. 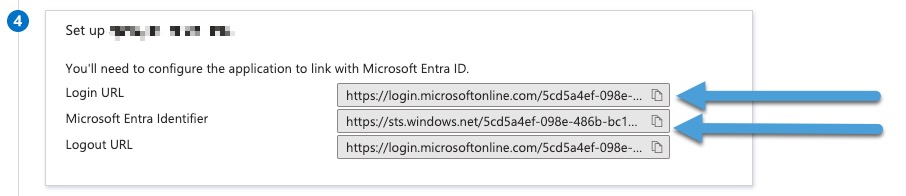
|