Create an Identity Policy with a Passive Authentication Rule
This task discusses how to create an identity policy with a passive authentication rule that authenticates users using the US realm sequence. If a user is not found in the first realm in the sequence, the system searches the other realms in the sequence in the order listed in the realm sequence. If a user is still not found in the realm or realm sequence, the user is identified as Unknown.
You can optionally authenticate a user with the captive portal (that is, active authentication) if the user is not found in any realm in the sequence. For more information, see Captive portal guidelines and limitations.
Procedure
Step 1 | Log in to the Firewall Management Center. |
Step 2 | Click . |
Step 3 | Click New Policy. |
Step 4 | Enter a Name for the policy and an optional Description. |
Step 5 | Click Save. |
Step 6 | Click Add Rule. |
Step 7 | Enter a Name for the rule. |
Step 8 | From the list, click Passive Authentication. |
Step 9 | Click the Realms & Settings tab page. |
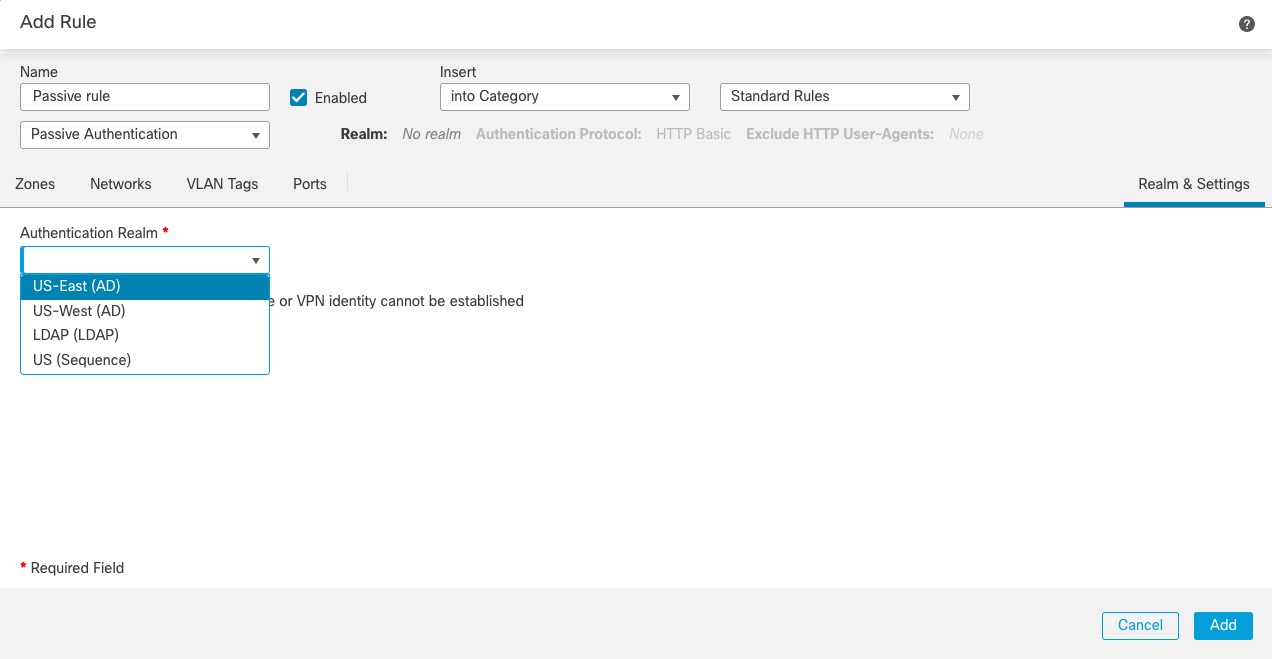
Step 10 | From the list, click the name of a realm or realm sequence. The following figure shows an example.
The following figure shows a sample passive identity policy configured to search for users in the US realm sequence.
|
Step 11 | (Optional.) To filter traffic by network object, click the Identity Source tab. From the list, click the network object to use to filter traffic for this identity policy. Click Add ( |
Step 12 | Set identity rule conditions as discussed in Identity rule conditions. |
Step 13 | Associate the identity rule with an access control rule as discussed in Associating other policies with access control. |
Step 14 | Deploy configuration changes to managed devices; see Deploy Configuration Changes. |


