Convert Snort 2 rules of a single intrusion policy to Snort 3
This task synchronizes and converts Snort 2 intrusion policy rules to Snort 3 format, ensuring that custom rules, thresholds, and suppressions are properly migrated to maintain security policy effectiveness when using Snort 3 engines.
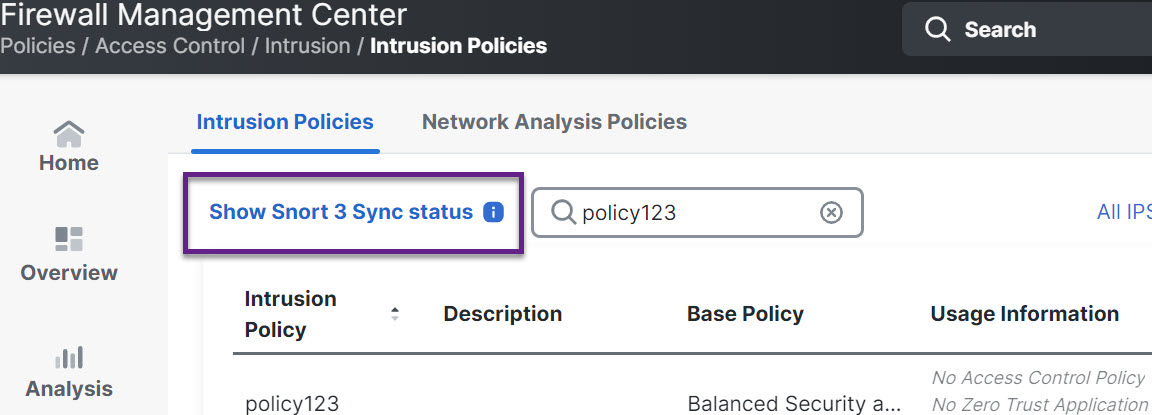
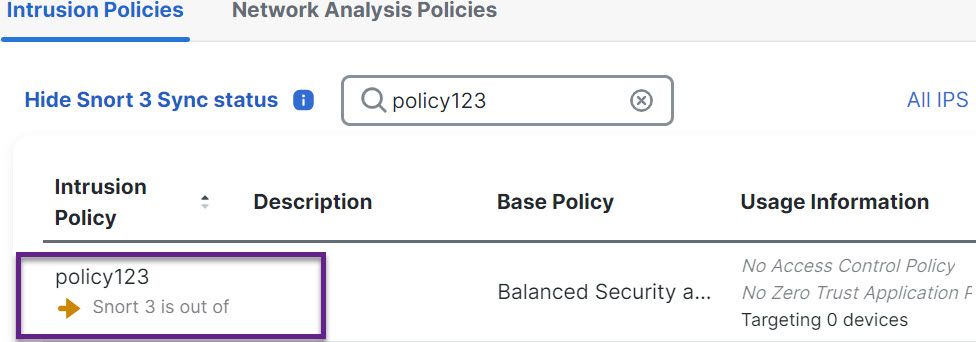
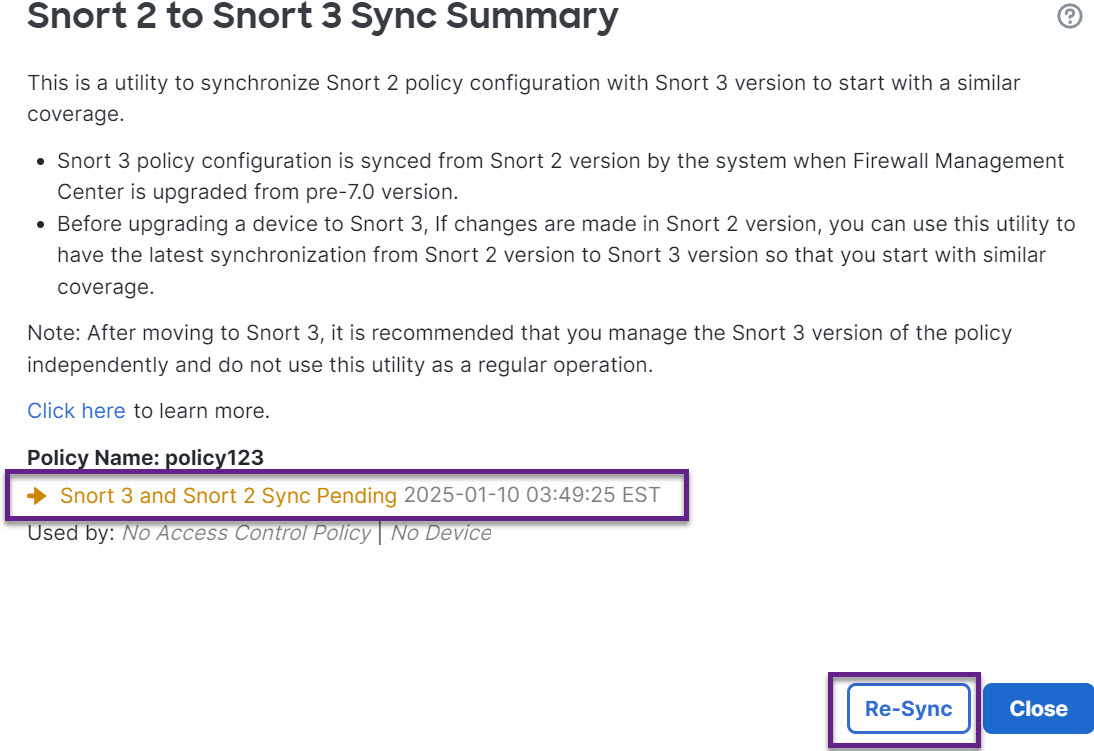
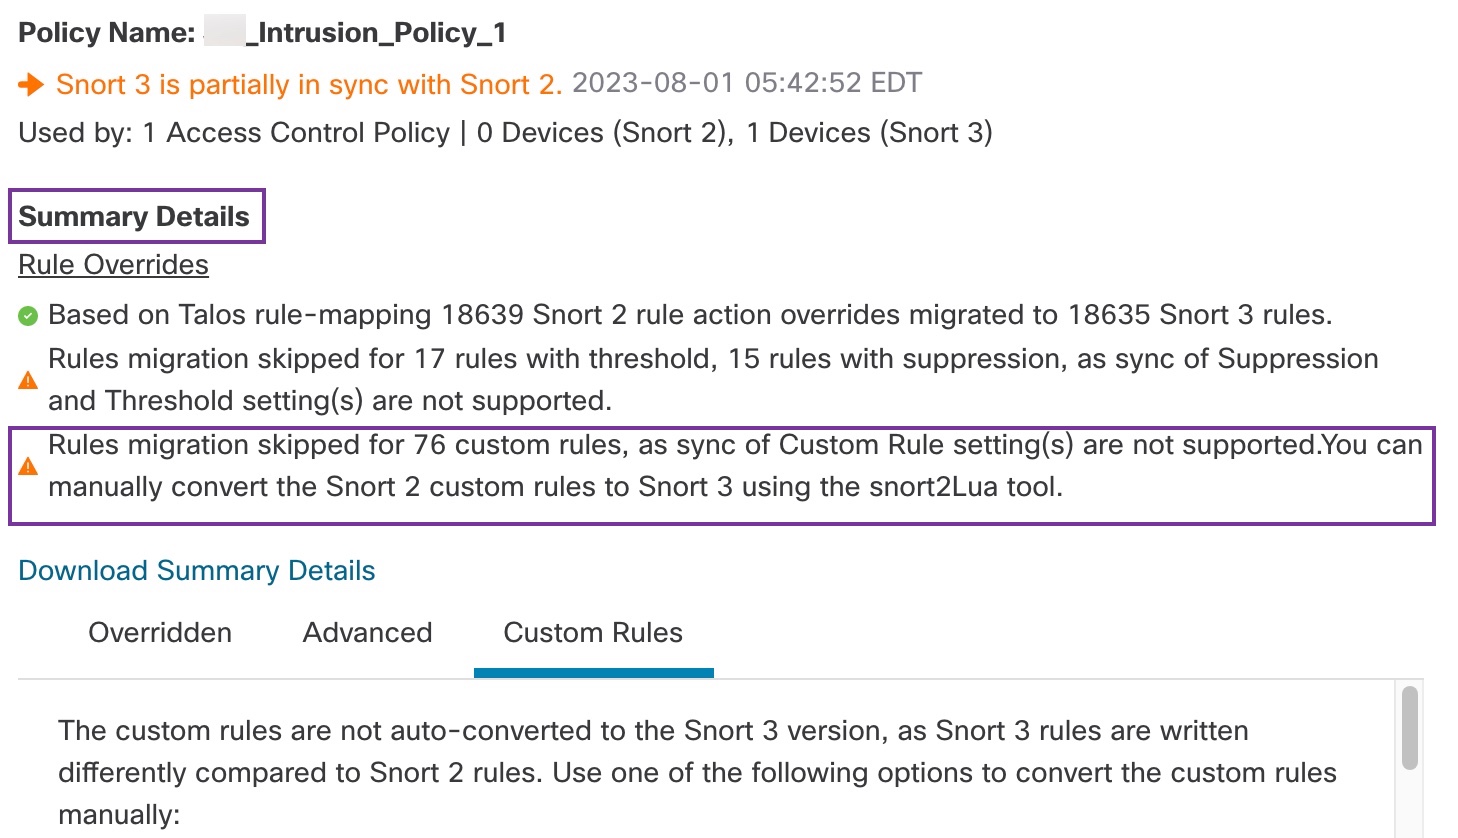
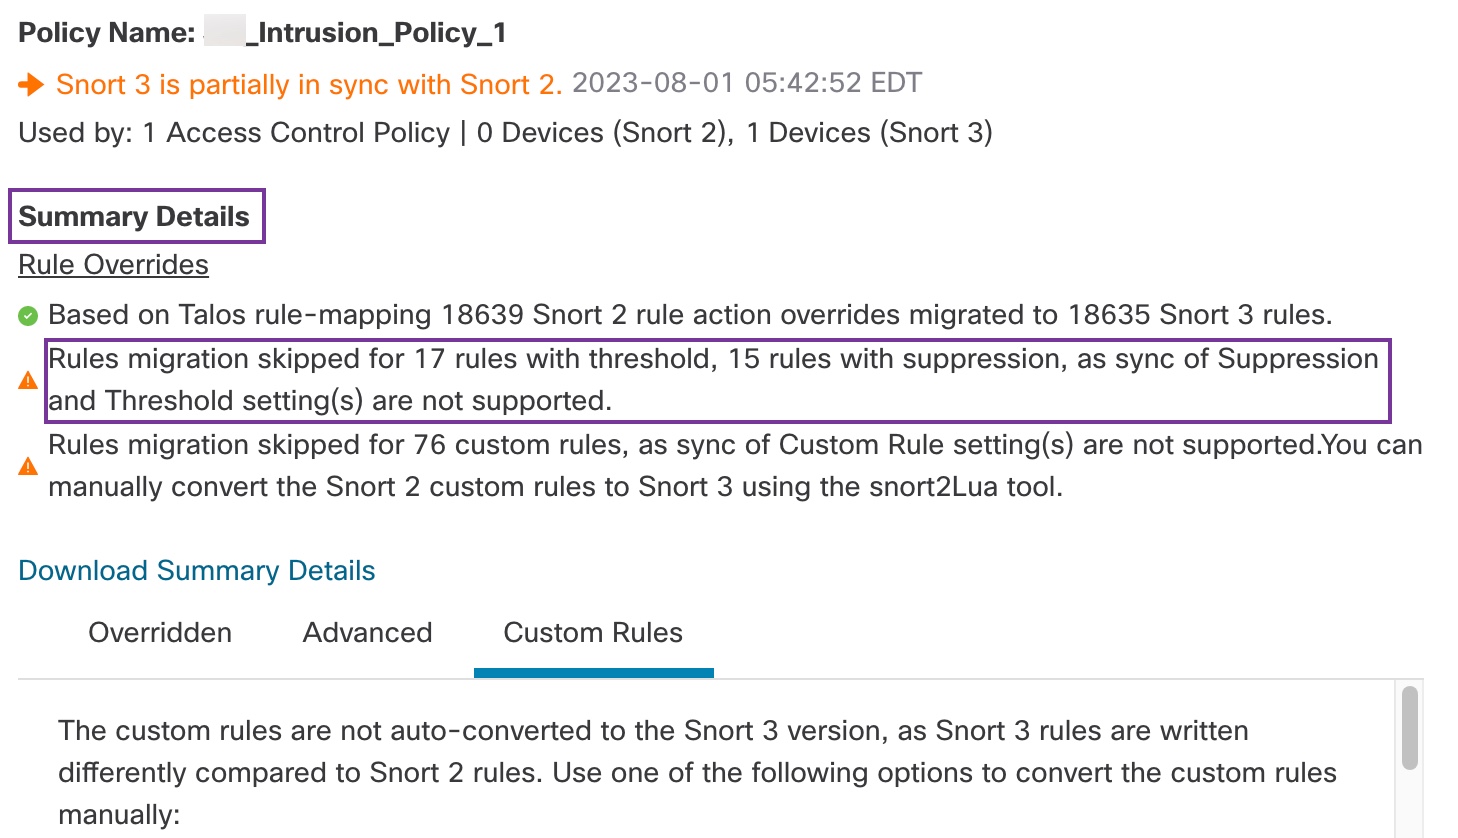
When intrusion policies display an orange arrow indicator, the Snort 2 and Snort 3 versions are not synchronized. The synchronization process uses the snort2Lua tool to convert rules and may require manual intervention for custom rules, thresholds, and suppressions that cannot be automatically migrated.
Before you begin
Follow these steps to convert Snort 2 rules of a single intrusion policy to Snort 3:
Procedure
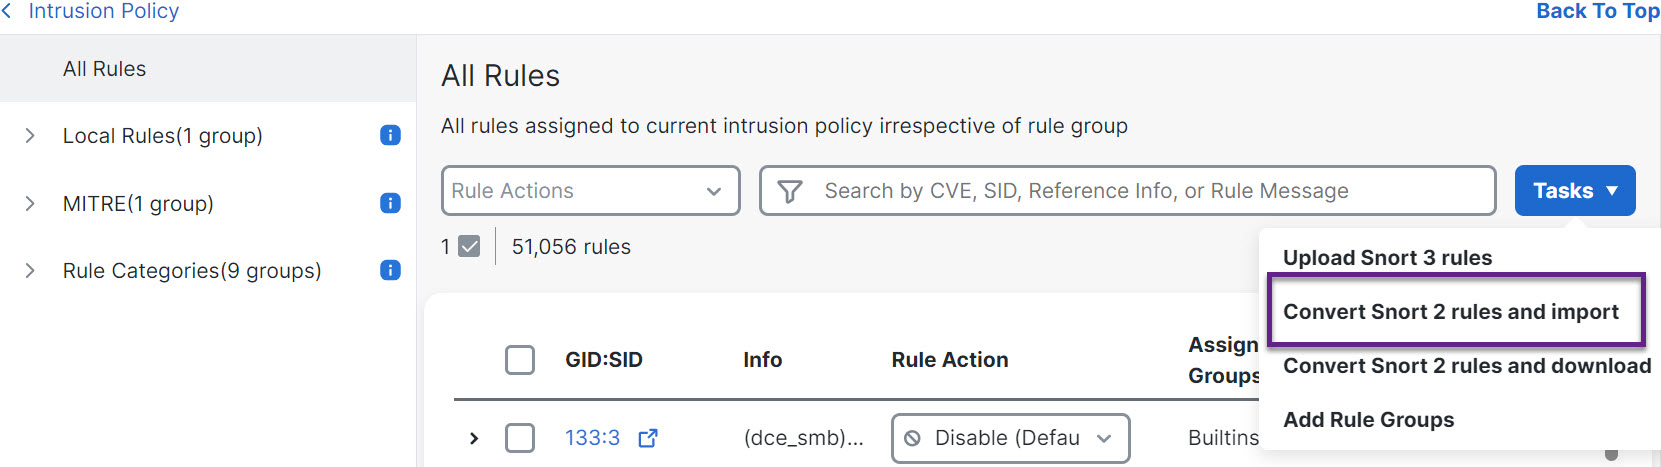
Step 1 | Choose .
| ||
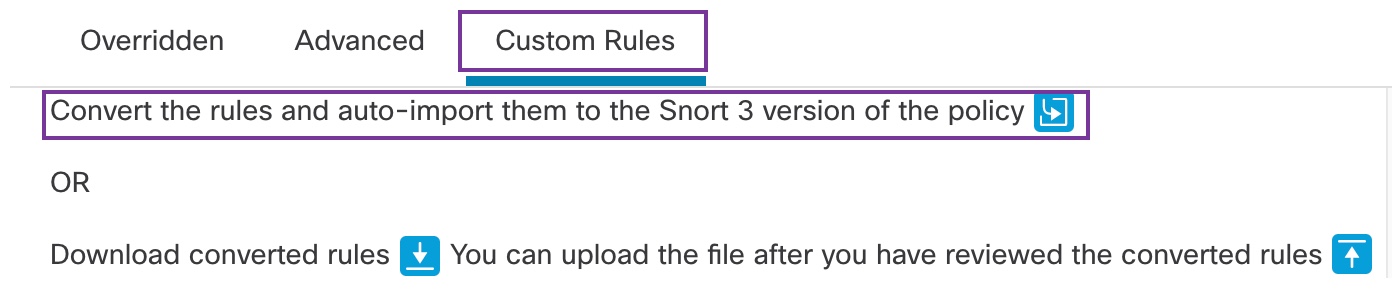
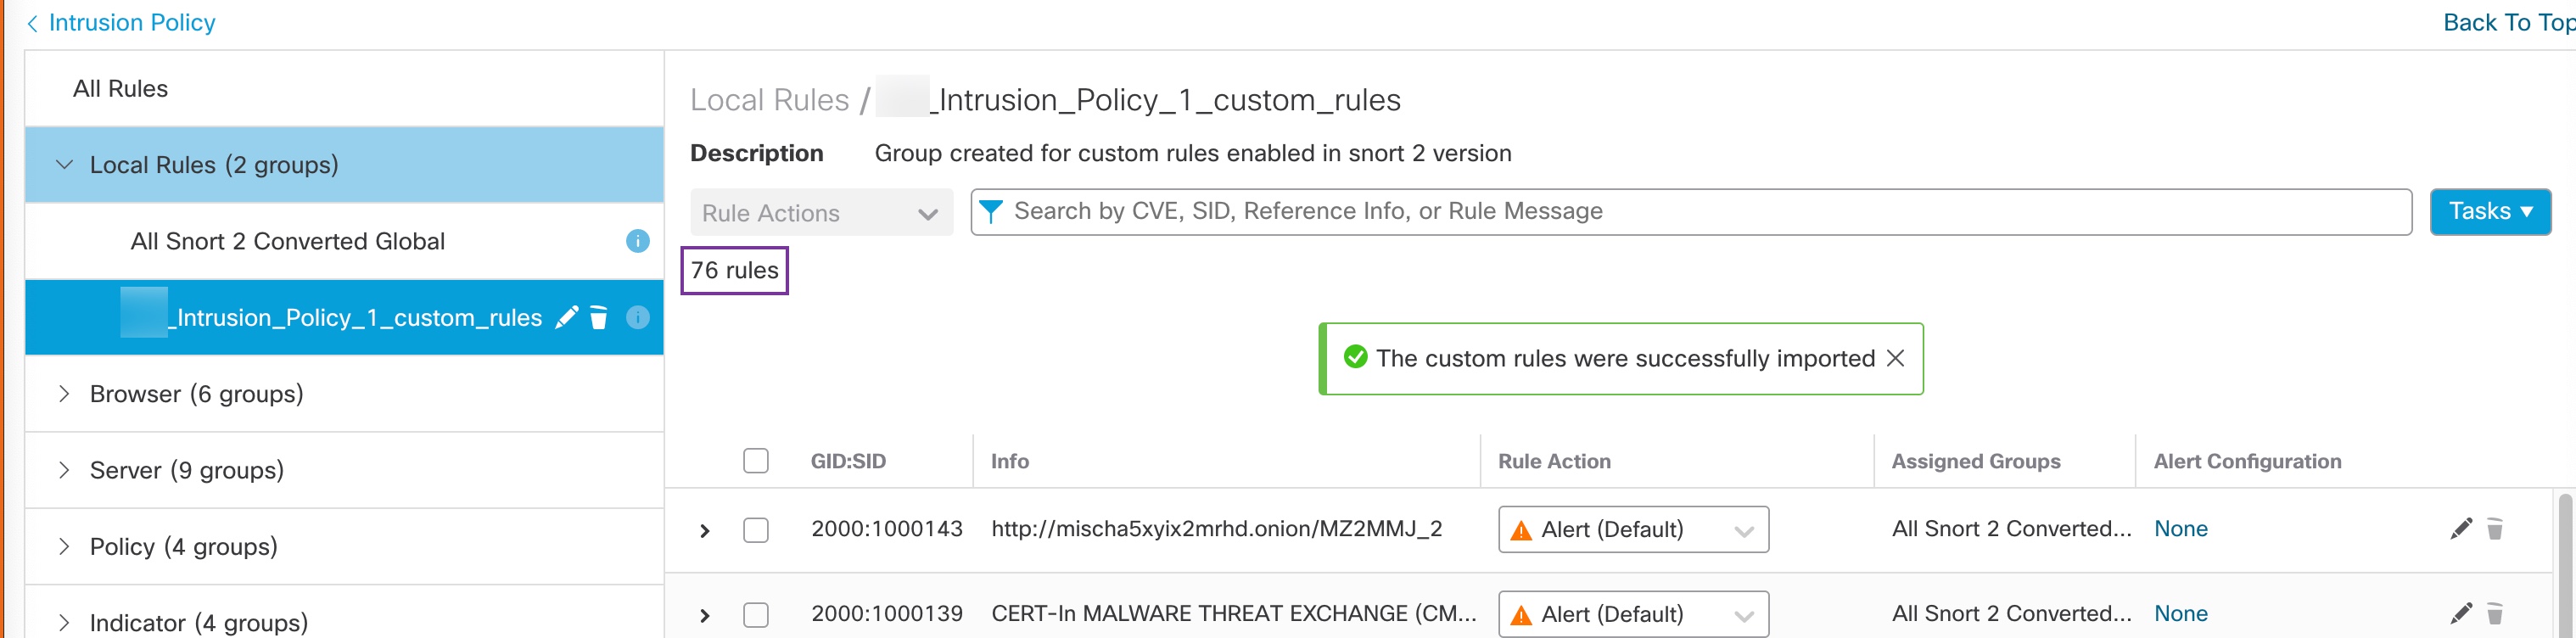
Step 2 | To migrate the 76 custom rules, perform either one of these steps:
| ||
Step 3 | Click the Download Summary Details link to download the rules in .txt format. This is a sample of the summary that is displayed. Example: | ||
Step 4 | Click Close to close the Sync Summary dialog box. | ||
Step 5 | To check the rules with status: ERROR, choose and click the Snort 2 version of the intrusion policy. | ||
Step 6 | Under Policy Information, click Rules and filter for the rule. For example, enter PSNG_TCP_PORTSCAN in the Filterfield to find the rule. | ||
Step 7 | Click Show Details to view the detailed version of the rule. | ||
Step 8 | Create the rule again in Snort 3 using Snort 3 rule guidelines and save the file as a .txt or .rules file. For more information, see www.snort3.org. | ||
Step 9 | Upload the custom rule that you just created locally to the list of all the Snort 3 rules. See Add Custom Rules to Rule Groups. |

What to do next
Deploy configuration changes. See Deploy configuration changes.