Activate the pxGrid Cloud identity source
This task explains how to activate the pxGrid Cloud identity source in the Security Cloud Control.
Before you begin
Complete the tasks discussed in Activate the app instance.
Note | Only one pxGrid Cloud identity source can be active at a time. |
Procedure
Step 1 | Log in to Security Cloud Control as a user with the Super Admin role. |
Step 2 | Click |
Step 3 | Click Identity Services Engine (pxGrid Cloud). |
Step 4 | Click Save at the top of the page. |
Step 5 | If a green check mark is not displayed next to the name of the identity source, select it. Example:
|
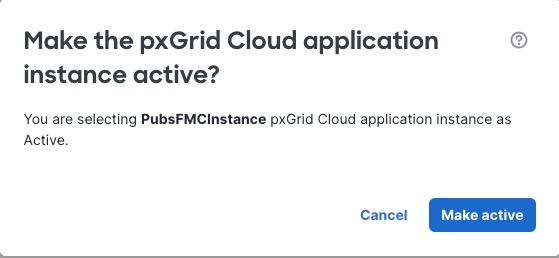
Step 6 | Click Make Active. Example:
|
Step 7 | (Optional.) Select the following options if desired:
|
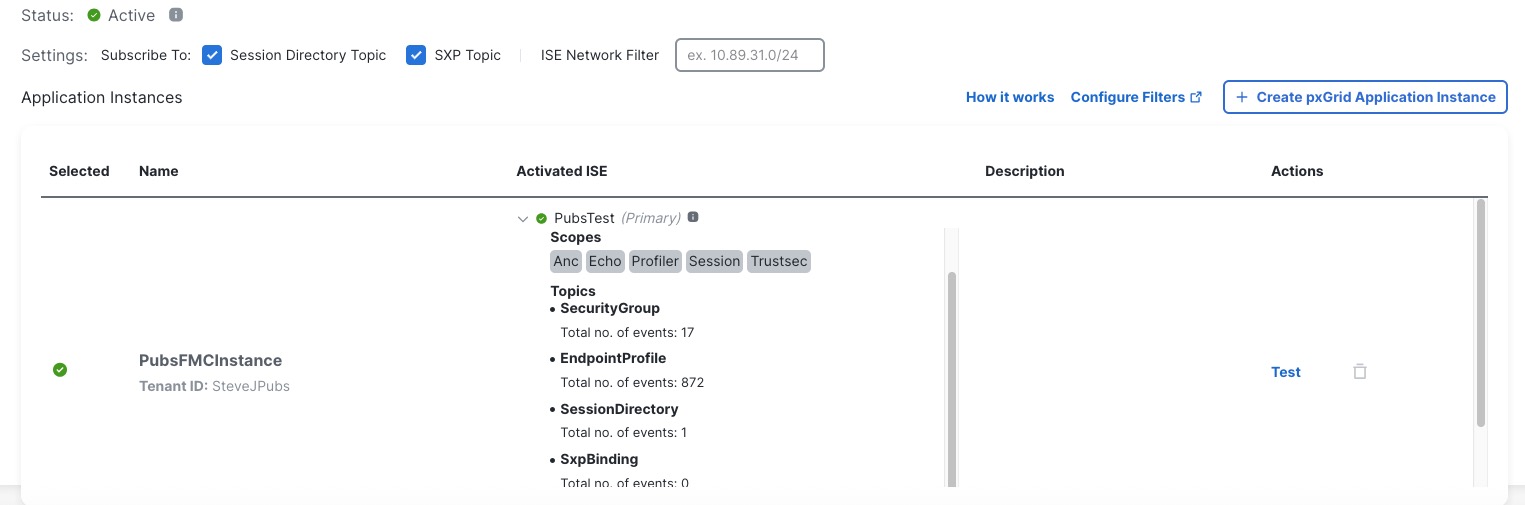
Step 8 | Under Activated ISE, expand the identity source. Example normal result:
Example error result:
In the event of an error, see Test the pxGrid Cloud identity source. |
Step 9 | Verify the status is Active and that all scopes and topics are displayed. |
Step 10 | Wait a few minutes for data to be downloaded. |