Configure Elephant Flow Parameters
Procedure
Step 1 | Choose . |
Step 2 | Click Edit ( |
Step 3 | Choose Advanced Settings from the More drop-down arrow at the end of the packet flow line. |
Step 4 | Click Edit ( 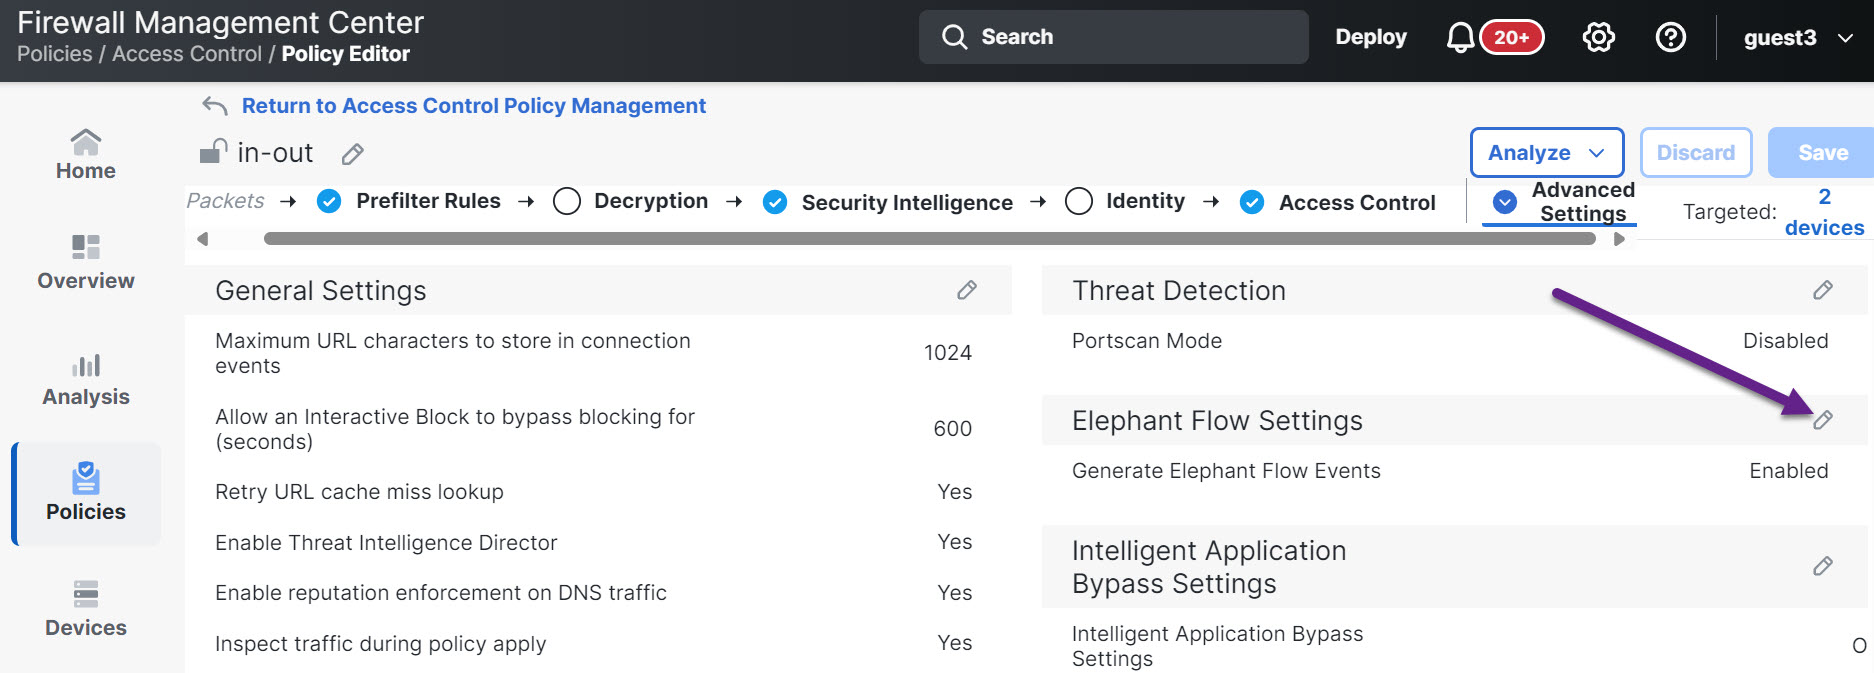
|
Step 5 | The Elephant Flow Detection toggle button is enabled by default. The default setting enables detection only and no default action is configured. The detection settings allow you to adjust the flow bytes and duration so that you can identify the elephant flows in your system. As a test setting, configure the flow bytes and duration parameters, as shown in the following figure. 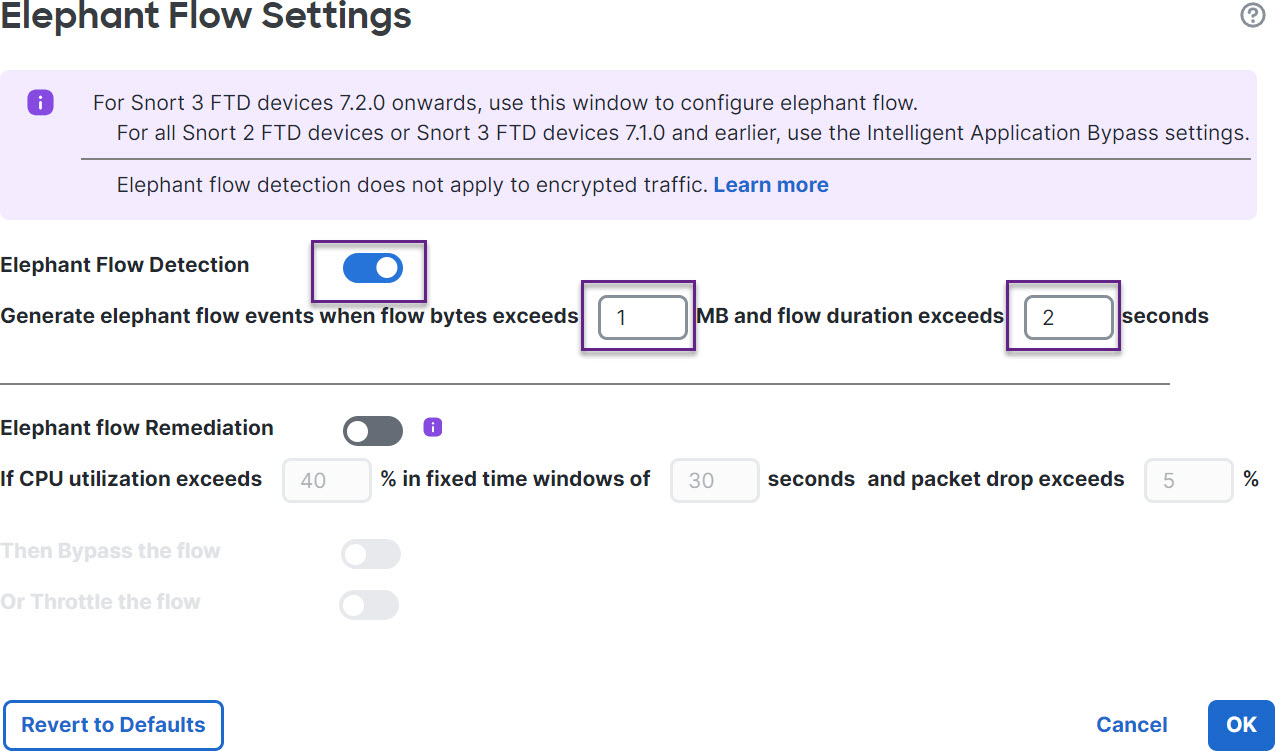
|
Step 6 | Enable the Elephant Flow Remediation toggle button. When an elephant flow is detected, you can choose to bypass or throttle the flow. Bypassing a flow means that the traffic is allowed to pass without Snort inspection. Throttling indicates that the flow throughput is reduced. This rate reduction is done in 10 percent increments until the CPU utilization reduces to lesser than the configured threshold. As a test setting, configure the elephant flow remediation parameters as shown in the following figure. 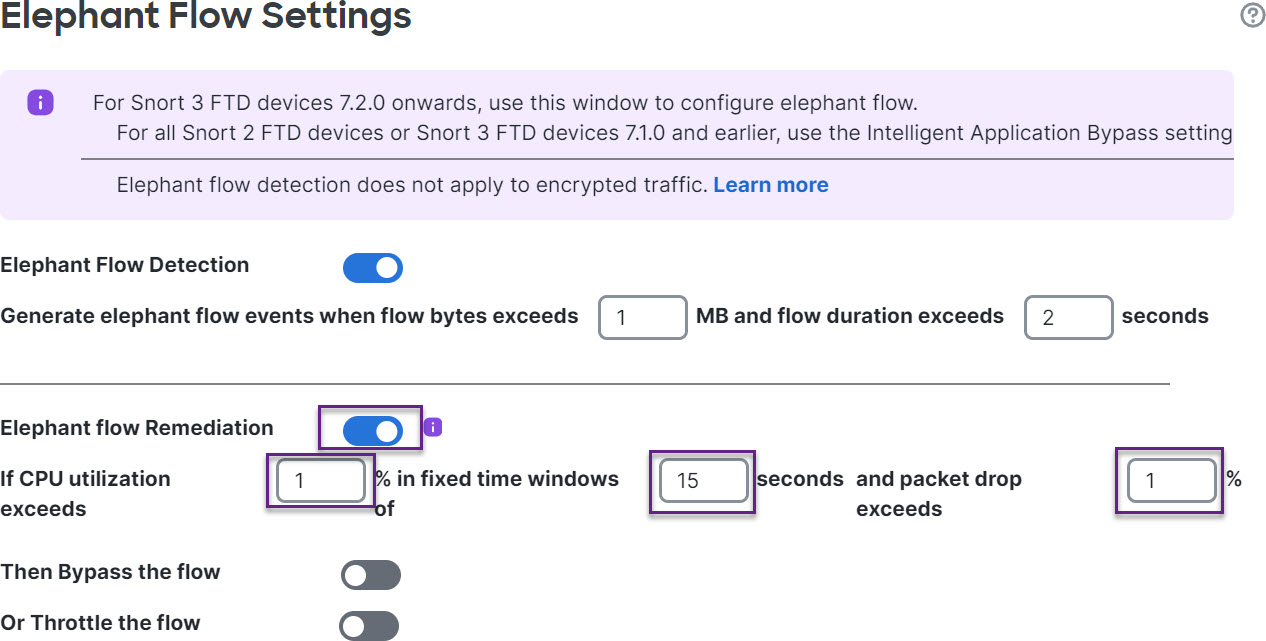
|
Step 7 | Enable the Bypass the flow toggle button and click the Select Applications/Filters radio button. 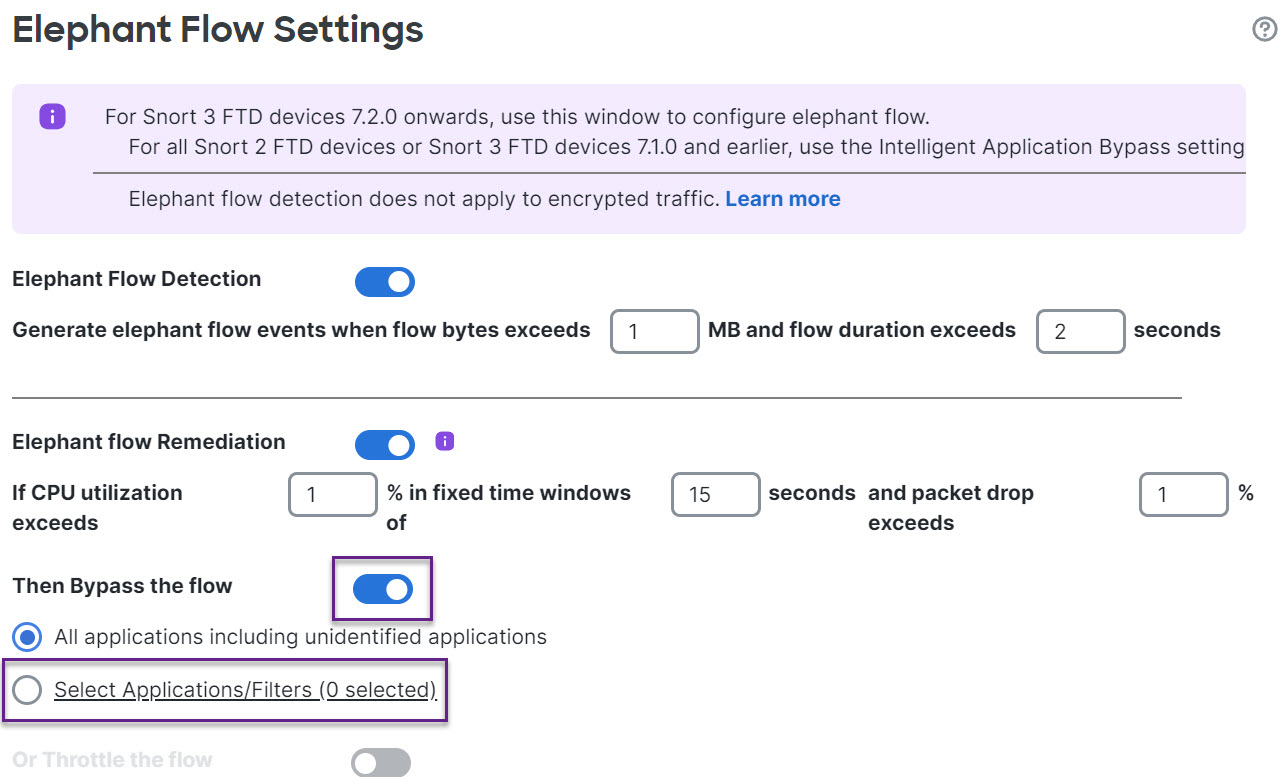
|
Step 8 | Under Application Filters, search for and select the WebEx application, add it to the rule, and click Save. This means that WebEx connections are trusted and prioritized and will skip Snort inspection if these WebEx connections are detected as elephant flows, based on the configured parameters. 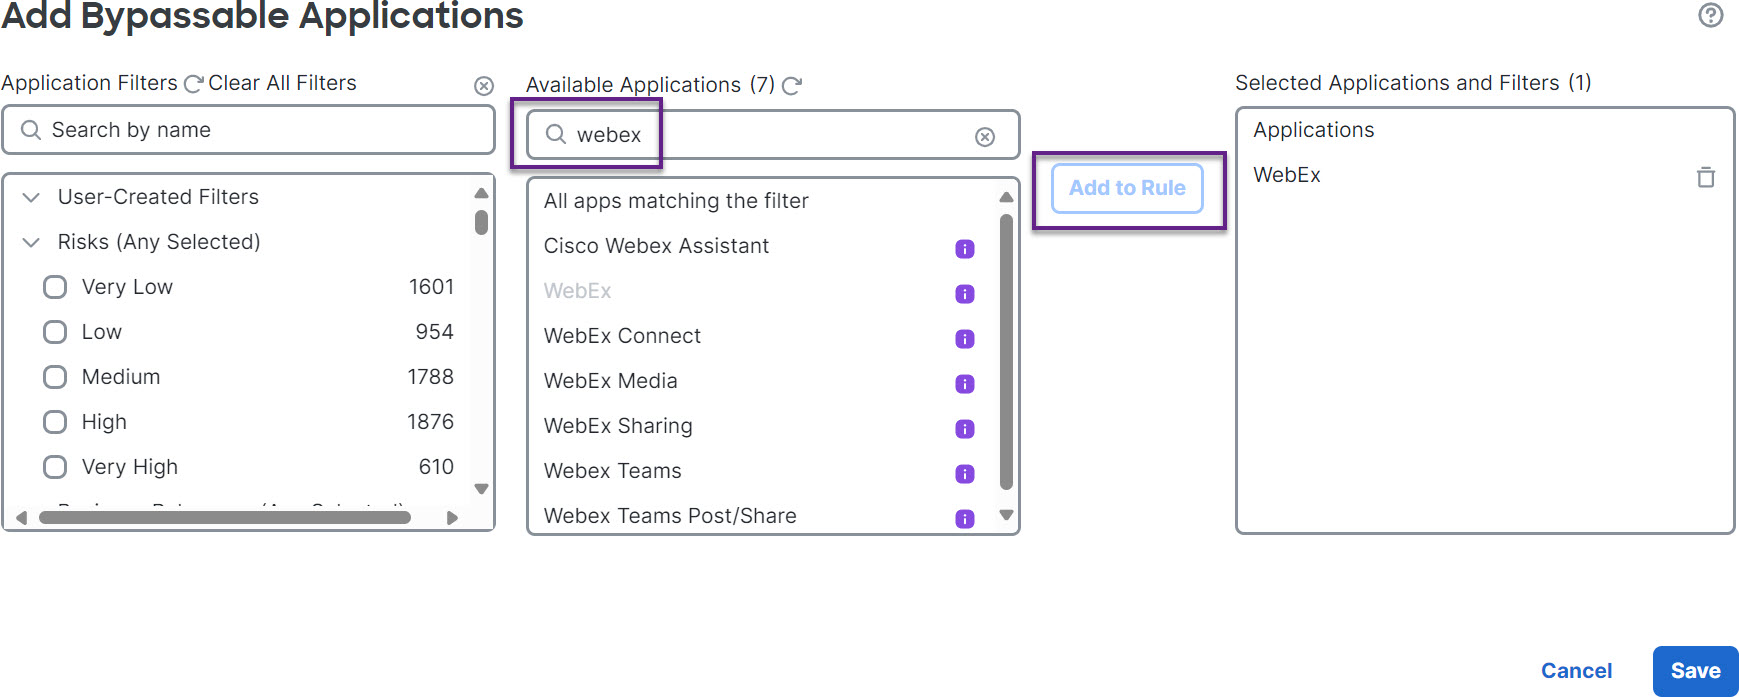
|
Step 9 | Enable the Throttle toggle button to throttle the remaining flows (causing duress). This ensures that all the other flows are slowed down in 10 percent increments until the Snort duress condition is met. |
Step 10 | Click OK. |
Step 11 | Click Save. |
What to do next
Deploy configuration changes. See Deploy Configuration Changes.