|
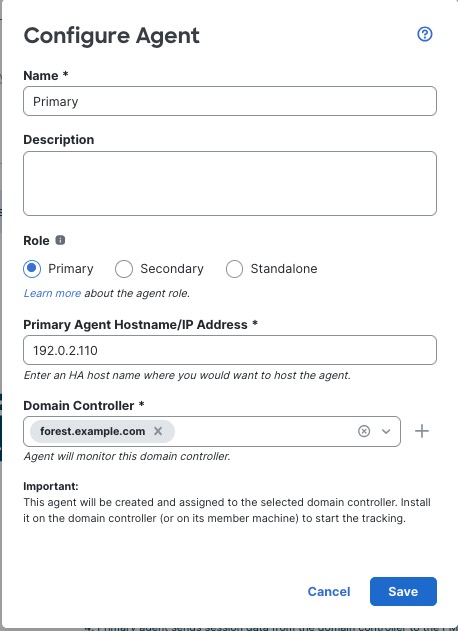
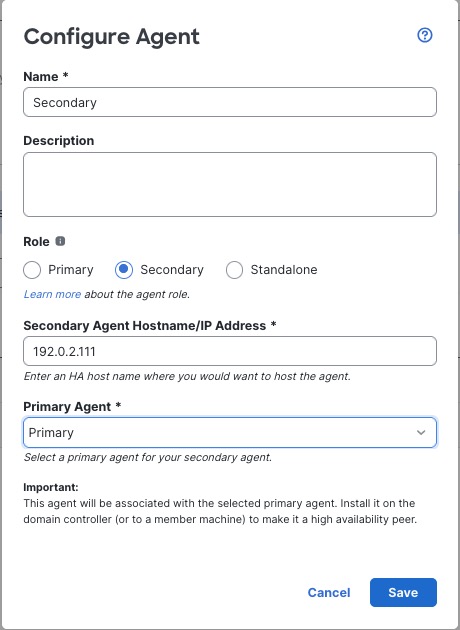
Role
|
Click one of the following:
-
Primary: The agent responsible for communicating with the Cloud-Delivered Firewall Management Center.
-
Secondary: Becomes the primary if the primary loses contact with the Cloud-Delivered Firewall Management Center.
For more information about roles, see About passive identity agent roles.
|
|
Primary Agent Hostname/IP Address
|
(Primary agent only.) Enter the fully qualified domain name or IP address of the server on which the primary passive identity
agent is installed.
The passive identity
agent version 1.0 supports IPv4 addresses and fully qualified domain names only. Version 1.1 supports IPv4, IPv6, and fully qualified domain names.
|
|
Secondary Agent Hostname/IP Address
|
(Secondary agent only.) Enter the fully qualified host name or IP address of the server on which the secondary passive identity
agent is installed.
The passive identity
agent version 1.0 supports IPv4 addresses and fully qualified domain names only. Version 1.1 supports IPv4, IPv6, and fully qualified domain names.
|
|
Primary Agent
|
(Secondary agent only.) From the list, click the name of the primary passive identity
agent.
|
|
Domain Controller
|
(Primary agent only.) From the list, select the check box next to each domain controller that has a passive identity
agent you wish to use for identity management and user control.
|


